KeylessUniversal
-- [[ FLUXBLOCKS GUIDE v1.6 - FULL STABLE RELEASE ]] --
local Player = game.Players.LocalPlayer
local UIS = game:GetService("UserInputService")

-- 1. Suche nach der Main GUI
local ScreenGui = game.CoreGui:FindFirstChild("FluxBlocks_auto") or Player.PlayerGui:FindFirstChild("FluxBlocks_auto")

if not ScreenGui then
    repeat
        task.wait(0.5)
        ScreenGui = game.CoreGui:FindFirstChild("FluxBlocks_auto") or Player.PlayerGui:FindFirstChild("FluxBlocks_auto")
    until ScreenGui or not task.wait(5)
end

if not ScreenGui then return end

-- Falls schon offen, altes Fenster entfernen
if ScreenGui:FindFirstChild("FluxGuide_UI") then
    ScreenGui.FluxGuide_UI:Destroy()
end

-- 2. Main Frame Erstellung
local GuideMain = Instance.new("Frame")
GuideMain.Name = "FluxGuide_UI"
GuideMain.Parent = ScreenGui
GuideMain.Size = UDim2.new(0, 280, 0, 350)
GuideMain.Position = UDim2.new(0.5, -140, 0.5, -175)
GuideMain.BackgroundColor3 = Color3.fromRGB(15, 15, 15)
GuideMain.BorderSizePixel = 0
GuideMain.Active = true
GuideMain.Draggable = true
GuideMain.ZIndex = 1000

local corner = Instance.new("UICorner", GuideMain)
corner.CornerRadius = UDim.new(0, 8)

-- 3. Animierter Rand (Orange/Gold Leuchtend)
local mStroke = Instance.new("UIStroke", GuideMain)
mStroke.Thickness = 2
mStroke.ApplyStrokeMode = Enum.ApplyStrokeMode.Border
mStroke.Color = Color3.fromRGB(255, 160, 0) -- Hellerer Fallback
local mGrad = Instance.new("UIGradient", mStroke)

-- 4. Header & Close Button
local Header = Instance.new("Frame", GuideMain)
Header.Size = UDim2.new(1, 0, 0, 35)
Header.BackgroundTransparency = 1
Header.ZIndex = 1001

local titleLabel = Instance.new("TextLabel", Header)
titleLabel.Size = UDim2.new(1, -40, 1, 0)
titleLabel.Position = UDim2.new(0, 12, 0, 0)
titleLabel.Text = "FLUX GUIDE"
titleLabel.Font = Enum.Font.GothamBold
titleLabel.TextSize = 14
titleLabel.TextColor3 = Color3.fromRGB(255, 180, 0)
titleLabel.BackgroundTransparency = 1
titleLabel.TextXAlignment = Enum.TextXAlignment.Left
titleLabel.ZIndex = 1002

local CloseBtn = Instance.new("TextButton", Header)
CloseBtn.Size = UDim2.new(0, 22, 0, 22)
CloseBtn.Position = UDim2.new(1, -28, 0, 6)
CloseBtn.Text = "X"
CloseBtn.Font = Enum.Font.GothamBold
CloseBtn.BackgroundColor3 = Color3.fromRGB(180, 0, 0)
CloseBtn.TextColor3 = Color3.new(1, 1, 1)
CloseBtn.ZIndex = 1003
Instance.new("UICorner", CloseBtn).CornerRadius = UDim.new(0, 5)
CloseBtn.MouseButton1Click:Connect(function() GuideMain:Destroy() end)

-- 5. Scrolling Content Bereich
local Scroll = Instance.new("ScrollingFrame", GuideMain)
Scroll.Size = UDim2.new(1, -15, 1, -50)
Scroll.Position = UDim2.new(0, 8, 0, 40)
Scroll.BackgroundTransparency = 1
Scroll.BorderSizePixel = 0
Scroll.ScrollBarThickness = 3
Scroll.ScrollBarImageColor3 = Color3.fromRGB(255, 140, 0)
Scroll.CanvasSize = UDim2.new(0, 0, 0, 0)
Scroll.AutomaticCanvasSize = Enum.AutomaticSize.Y
Scroll.ZIndex = 1001

local layout = Instance.new("UIListLayout", Scroll)
layout.Padding = UDim.new(0, 6)
layout.SortOrder = Enum.SortOrder.LayoutOrder

local function addText(txt, isTitle)
    local label = Instance.new("TextLabel", Scroll)
    label.Size = UDim2.new(1, -10, 0, 0)
    label.BackgroundTransparency = 1
    label.Text = txt
    label.TextColor3 = isTitle and Color3.fromRGB(255, 190, 50) or Color3.fromRGB(210, 210, 210)
    label.Font = isTitle and Enum.Font.GothamBold or Enum.Font.Gotham
    label.TextSize = isTitle and 14 or 12
    label.TextWrapped = true
    label.TextXAlignment = Enum.TextXAlignment.Left
    label.AutomaticSize = Enum.AutomaticSize.Y
    label.ZIndex = 1002
end

-- 6. Daten laden & Animation (Patched for Brightness)
task.spawn(function()
    -- Hellerer Animation Loop
    task.spawn(function()
        while GuideMain and task.wait(0.05) do
            local pulse = (math.sin(tick() * 1.5) + 1) / 2
            local hue = 0.07 + (pulse * 0.04)
            local saturation = 0.9 + (pulse * 0.1)
            local brightness = 0.8 + (pulse * 0.2)

            local clrLight = Color3.fromHSV(hue, saturation, brightness)
            local clrDark = Color3.fromHSV(hue, saturation, brightness - (pulse * 0.15))

            titleLabel.TextColor3 = clrLight
            mGrad.Color = ColorSequence.new({
                ColorSequenceKeypoint.new(0, clrLight),
                ColorSequenceKeypoint.new(1, clrDark)
            })
            mGrad.Rotation = (tick() * 60) % 360
        end
    end)

    -- Pastebin Daten ziehen
    local success, content = pcall(function()
        return game:HttpGet("https://pastebin.com/raw/5B0zYwnU")
    end)

    if success and content and #content > 1 then
        for _, line in pairs(content:split("\n")) do
            if #line:gsub("%s+", "") > 0 then
                if line:sub(1,1) == "#" then addText(line:sub(2), true)
                else addText(line, false) end
            end
        end
    else
        addText("Fehler beim Laden!", true)
        addText("Konnte Guide nicht von Pastebin ziehen.", false)
    end
end)No comments yet for this script.
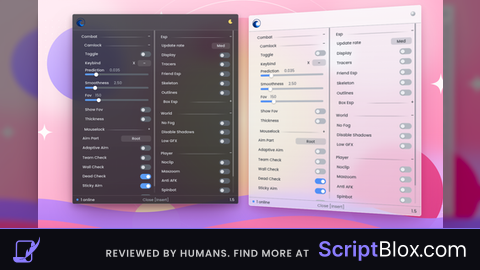
![[KEYLESS] Moondiety Script | 17+ supported Games](https://scriptblox.com/images/sb/0-1753093706828.png)